
Documentation
Split Expense
Splitting Transaction Into Different Categories
Sometimes we may want to make an expense come out of 2 or more categories. We can achieve this via Split Expense.
To demonstrate how this works, let's imagine that we are at Walmart shopping for groceries. While walking through the store we notice a pair of shoes and decide to buy it.
The total at checkout comes out to $150. We take a look at the receipt and see that $100 was spent on food and $50 on shoes. We decide that $100 will be coming out of the FOOD category and $50 for shoes will come out of the SAVINGS category.
Below are our current category totals.
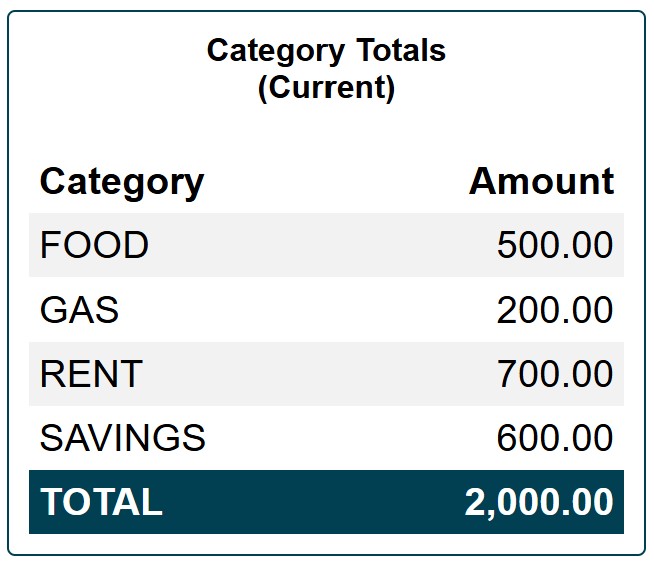
We can accomplish this by creating 2 separate transactions: a transaction of $100 for food and another transaction of $50 for shoes.
The problem with this approach is now we have 2 separate transactions that will not match any transactions in our actual bank account, which will be showing only 1 transaction of $150.
To solve this problem we can utilize Split Expense, which will allow us to enter 1 transaction and then split it into 2 different categories.
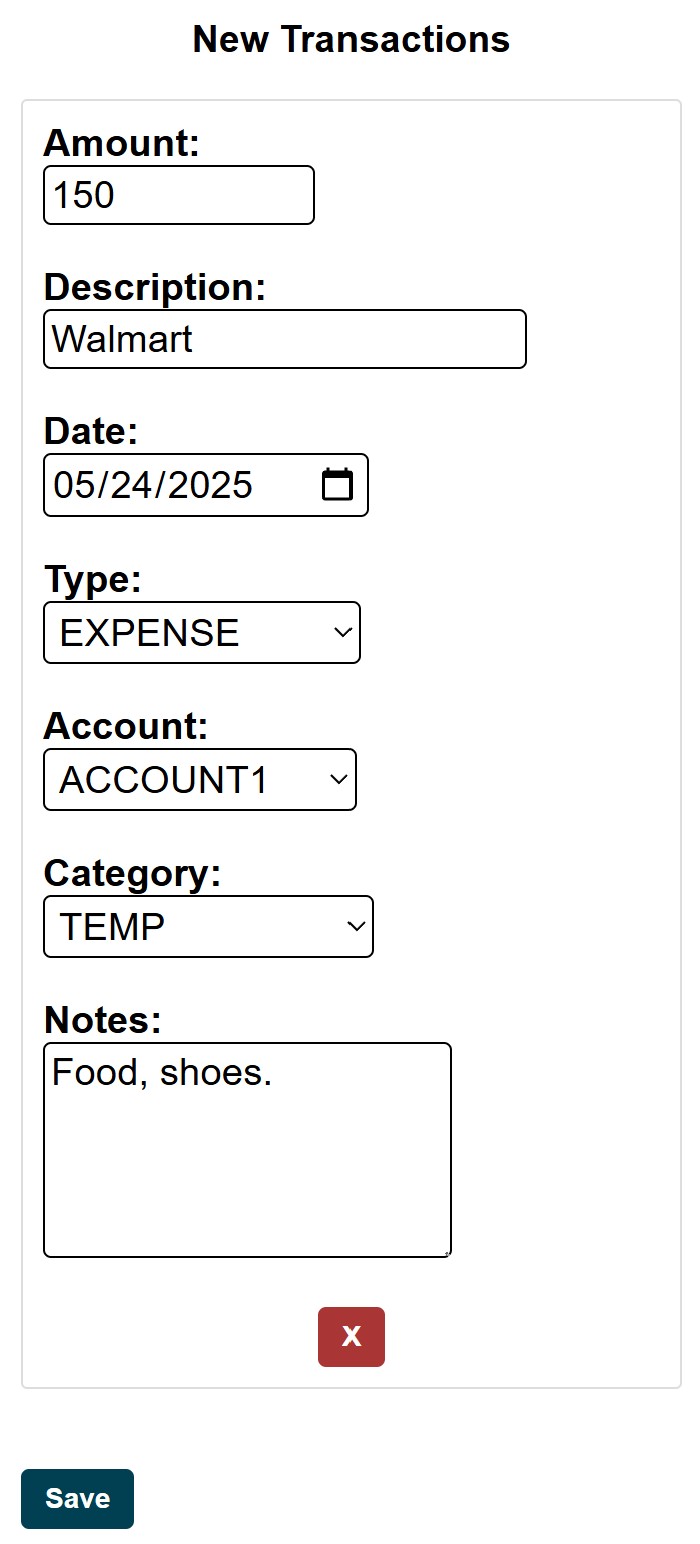
To split an expense between different categories we first need to create a new transaction () and pull funds from the TEMP category. Remember that TEMP category is a built-in category that is used to hold funds temporarily.
New Transactions screen will look different if you are using a computer but all of the fields are the same as in the screenshot below.
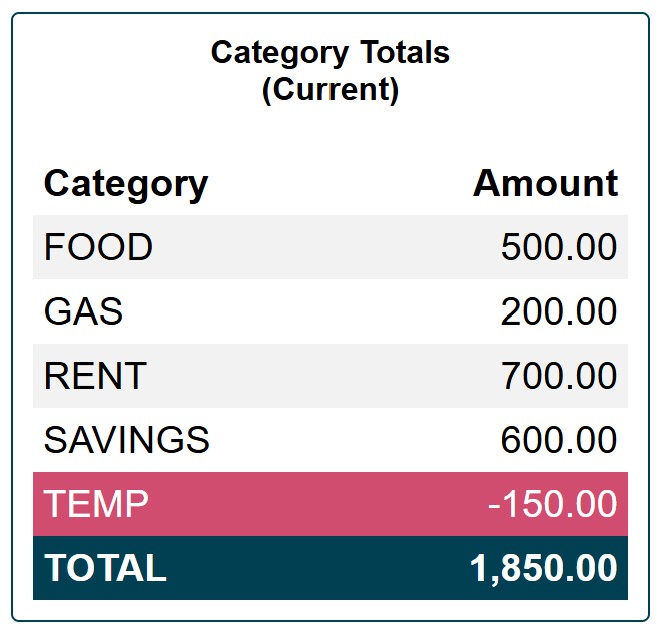
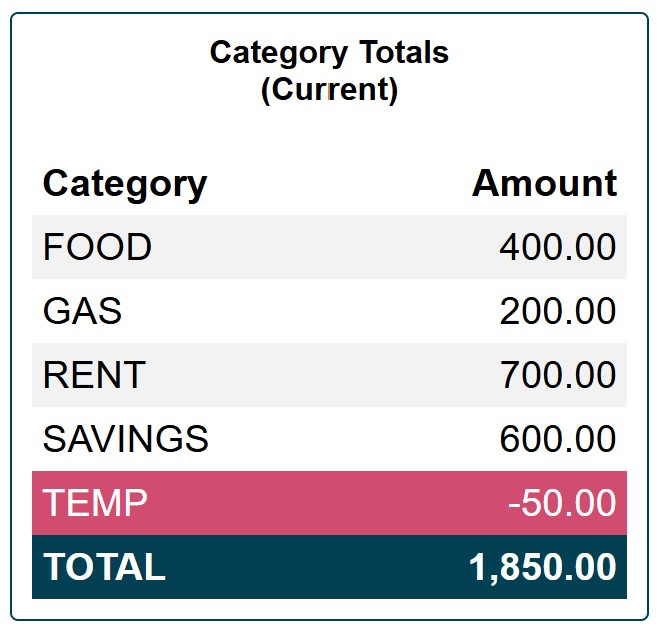
After transaction is saved the TEMP category will show -$150. Since it was $0 initially and we just took $150 out if it, it will show a negative amount.
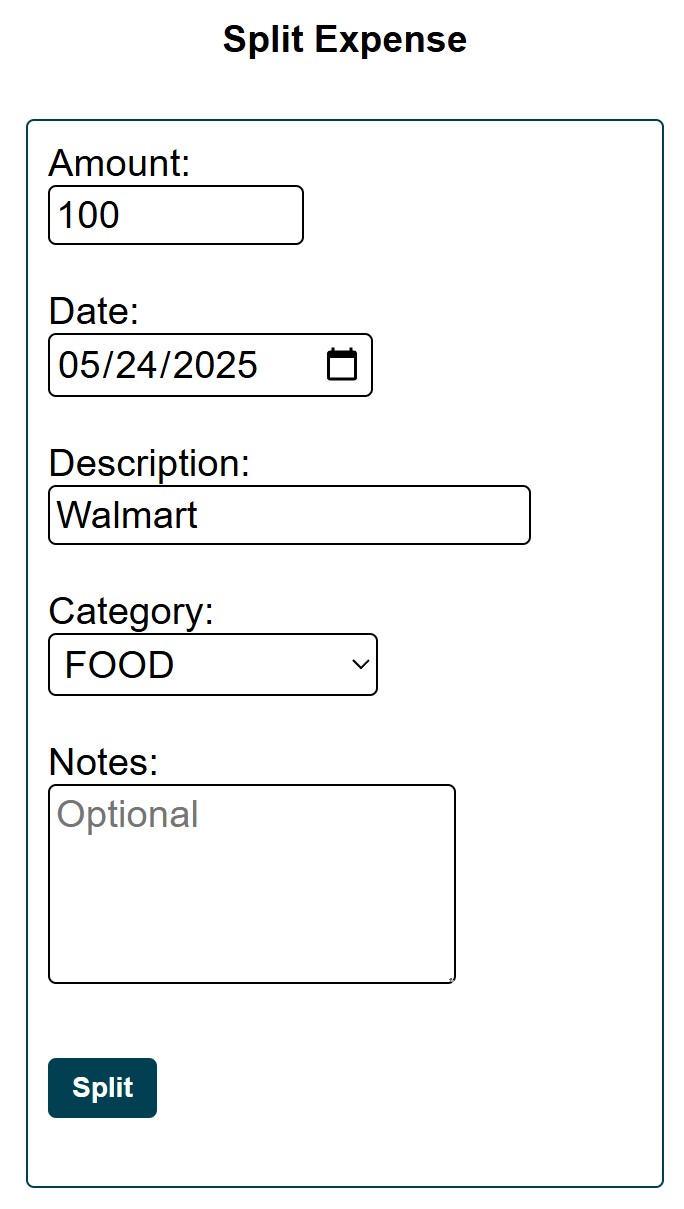
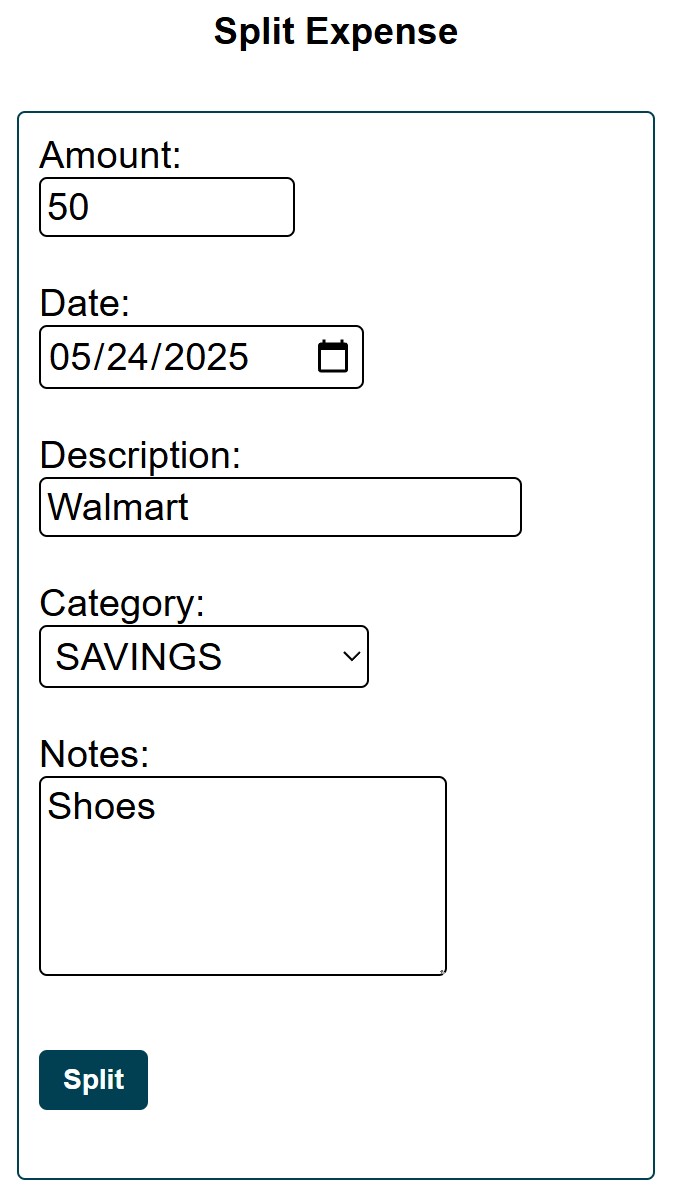
The next step is to go to Split Expense () and split this transaction into different categories. Or, in other words, make the funds come out of the FOOD and SAVINGS categories.
The first one we split will be food.
Categoy Totals will now show that FOOD has decresed from $500 to $400. TEMP has incresed by $100 from -$150 to -$50.
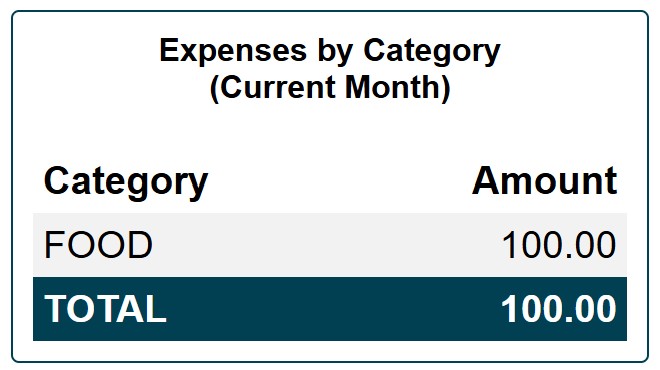
What the Split Expense has actually done was move $100 from FOOD category to TEMP category. It is essentially the same as Category Transfer. The only difference is that $100 was captured as an expense out of the FOOD category.
We can see this reflected in the Expenses by Category in overview ().
Next we are going to split shoes, which will come out of the SAVINGS category.
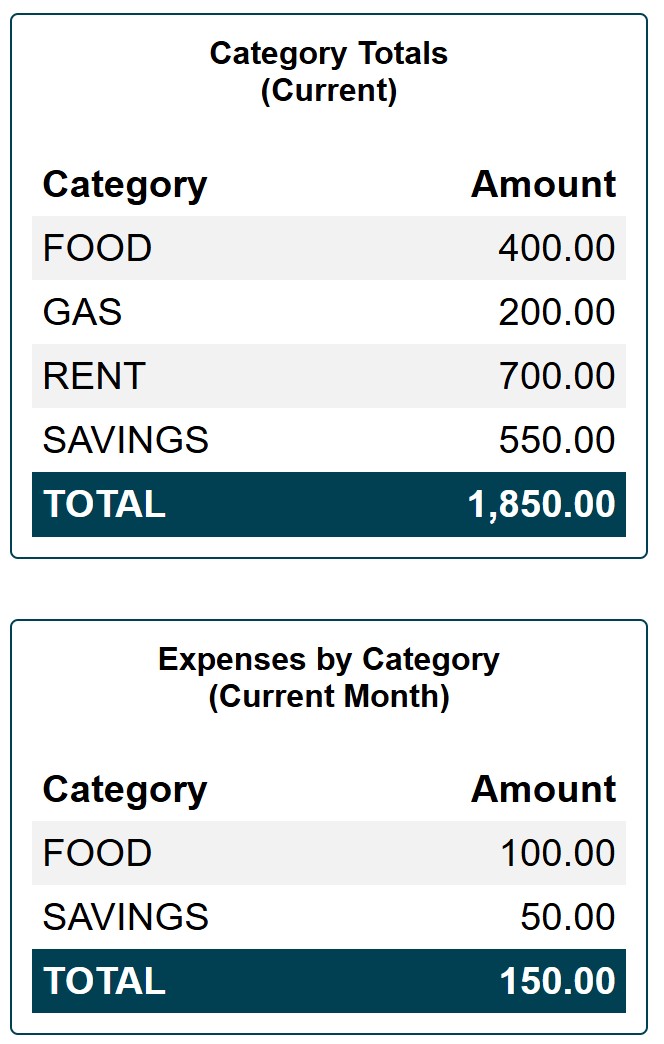
Again, what the Split Expense has done was move $50 from SAVINGS category to TEMP category and captured this $50 as an expense out of the SAVINGS category.
In Overview we can see that TEMP category has disappeared (because it's now $0) and this transaction of $150 was captured as an expense out of FOOD and SAVINGS categories.
Splitting Transaction Into Different Categories
Sometimes we may want to make an expense come out of 2 or more categories. We can achieve this via Split Expense.
To demonstrate how this works, let's imagine that we are at Walmart shopping for groceries. While walking through the store we notice a pair of shoes and decide to buy it.
The total at checkout comes out to $150. We take a look at the receipt and see that $100 was spent on food and $50 on shoes. We decide that $100 will be coming out of the FOOD category and $50 for shoes will come out of the SAVINGS category.
Below are our current category totals.
We can accomplish this by creating 2 separate transactions: a transaction of $100 for food and another transaction of $50 for shoes.
The problem with this approach is now we have 2 separate transactions that will not match any transactions in our actual bank account, which will be showing only 1 transaction of $150.
To solve this problem we can utilize Split Expense, which will allow us to enter 1 transaction and then split it into 2 different categories.
To split an expense between different categories we first need to create a new transaction () and pull funds from the TEMP category. Remember that TEMP category is a built-in category that is used to hold funds temporarily.
New Transactions screen will look different if you are using a computer but all of the fields are the same as in the screenshot below.
After transaction is saved the TEMP category will show -$150. Since it was $0 initially and we just took $150 out if it, it will show a negative amount.
The next step is to go to Split Expense () and split this transaction into different categories. Or, in other words, make the funds come out of the FOOD and SAVINGS categories.
The first one we split will be food.
Categoy Totals will now show that FOOD has decresed from $500 to $400. TEMP has incresed by $100 from -$150 to -$50.
What the Split Expense has actually done was move $100 from FOOD category to TEMP category. It is essentially the same as Category Transfer. The only difference is that $100 was captured as an expense out of the FOOD category.
We can see this reflected in the Expenses by Category in overview ().
Next we are going to split shoes, which will come out of the SAVINGS category.
Again, what the Split Expense has done was move $50 from SAVINGS category to TEMP category and captured this $50 as an expense out of the SAVINGS category.
In Overview we can see that TEMP category has disappeared (because it's now $0) and this transaction of $150 was captured as an expense out of FOOD and SAVINGS categories.